COMP 141, Homework

Dear COMP 141 Students,
Please find below some tips to answer Homework #7. I acknowledge this is a more challenging assignment, in particular given the course’s asynchronous and fully remote nature. Because of this, I’d like to give you some hints that might be useful to answer it.
May you have any questions, please let me know.
– Daniel (dmoreira1@luc.edu)
Question 1
The steps below will give you some structure to answer this question.
1.1. Create a username on GitHub.
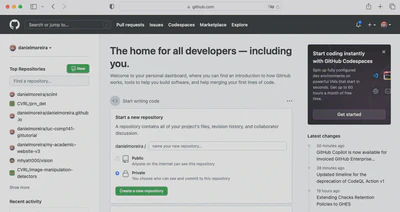
You can do this at https://github.com, using the “Sign Up” button in the top right corner of the page. Follow the steps and provide a screenshot with your new GitHub profile. This will be your screenshot number one.
Mine is below, for your reference.
1.2. Create a project on GitHub.
This can be done through the GitHub web interface, from your GitHub profile page that you’ve just used to generate a screenshot. In the top right corner of your profile page, there is button with a plus sign. Click there and select the “New repository” option.
In the following page, provide a “Repository name”, and mark it as “Public” (so that everybody, including the TA and me, can access it). Don’t forget to select the “Add a README file” option, so your project is not empty. You may also provide a project “Description”, if you want. This will be useful once you get to the point where you have lots of projects. A possible description is “My first GitHub project for Comp 141.”.
After doing this, go to the bottom of the page, and click on the “Create repository” button. Voilà, you now have your new project on GitHub, on the web. Provide a screenshot of the current project page; this will be you screenshot number two.
1.3. Clone the project from GitHub (on the web) to your local computer.
On your computer, open the terminal screen. Make sure you have git installed:
user@host: git --version
If you don’t, install it with either apt-get or homebrew, depending on your OS. For Linux users (your COMP 141 Virtual Machine is Linux):
user@host: sudo apt install git
For macOS users:
user@host% brew install git
Clone the project from GitHub to your local machine.
Go to your project GitHub page (the one you’ve just used to generate the last screenshot),
and click on the “<> Code” button on the top mid-right portion of the screen.
Select the “HTTPS” option on the “Clone” function and copy the
“https://gtihub.com/<your_name>/<your_project>” link.
Go back to the terminal and type:
user@host: git clone https://gtihub.com/<your_name>/<your_project>
Don’t forget to paste and replace “https://gtihub.com/<your_name>/<your_project>”
with the content you’ve just copied from your GitHub project page.
Voilà, your project was copied to your local computer. Execute the “ls” command on your terminal and localize your project folder; the folder’s name will be the same as your project’s. Generate a screenshot of your terminal with this content and add to your answers; this will be your screenshot number three.
1.4. Setup an authentication token, so you can upload things to your GitHub project.
This is a step with security purposes, to avoid people inadvertently messing up with your project. Go to your GitHub profile page (the one you’ve used to generate the first screenshot). Click on your profile picture in the top right corner of the page. Select the “Settings” option on the drop-down menu.
On the following page, on the left-side menu, select the “Developer settings” option (yes, you’ll be a developer). On the following one, select the “Personal access tokens” drop-down option. We want the “Tokens (classic)” feature. Click on it and proceed to the next page.
On the next page, select the top right corner “Generate new token” button. Again, select the “Generate new token (classic)” option. Provide your GitHub password, to proceed to the next step.
Fill-in the blanks of the form within the next page. For instance, in the “Note” field, add something like “My first token for test purposes.” For the “Expiration” field, select “No expiration” and ignore, for now, the warning message (we can talk about it in more detail through e-mail, if you want to). In the available “scopes”, select the “repo” one. Go to the bottom of the page and click on the “Generate token” button.
Voilà, your created a GitHub security token. Take a screenshot of the next page and add to your answers; this will be your screenshot number four.
Don’t forget to copy the long string that is provided in this page. This will be your password to upload local modifications to your GitHub project. We’ll need it in the next step.
1.5. Add a new file to your project.
Back to your local machine, using your terminal, create a new file on your project’s folder. Make sure (with “pwd”, “cd”, and “ls”) that you’re inside the correct folder. You may use any file editor of your preference. In the example below, I’m using “vi” to edit files.
user@host: cd <your_project>
user@host: vi my_file.txt
Don’t forget to replace “<your_project>” with your project’s folder.
Type some content to “my_file.txt” and save it. In the real world, you’ll be doing this over a program source code, adding lines of commands and program configurations. Save the file and quit the file editor.
Now it’s time to “upload” the local file to your project on Git. In your local terminal, inside the folder of your project, execute the following command:
user@host: git add my_file.txt
This command is telling the GitHub application that you want to include the file you’ve just created to your project. After doing this, “commit” the added file to a new version of your project:
user@host: git commit my_file.txt -m "Adding my_file.txt to the project."
Observe that the message given to “-m” can be any string and should be descriptive of what you’re doing with your project.
Now comes the time to upload the new project version (with the local modifications). You can do it by using the “git push” command:
user@host: git push origin main
This command will request your GitHub username (the same you used in your profile), and a password. Provide the long string generated in the previous step as the password. If successful, this command will upload “my_file.txt” to the GitHub project web page, in the “main” branch of your project.
Other branches are possible (for different versions of the program being developed), but this is something you’ll learn in your future as a developer.
Go to your GitHub project page (the one that you’ve used to generate the second screenshot) and verify that “my_file.txt” is available there, together with the “README.md” file. Take a screenshot of this status and add to your answers; this will be your screenshot number five.
1.6. Watch the content of https://www.youtube.com/watch?v=0fKg7e37bQE
Watch the content of the GitHub tutorial and try to make a parallel with the steps above. May you have any questions about the video and the steps, please let me know.
GitHub is an amazing tool that you must use in your coding career.
Question 2
The steps below will give you some structure to answer this question.
2.1. Create a JSON file using your local terminal.
JSON files are text files in “JavaScript Object Notation” (JSON) whose content is structured in a more human-readable format. JSON files aim at storing data about the elements of a problem domain, whose reading is easy to people. In the example below, downloaded from this link, we have data about cats that might be useful for a veterinary app.
[
  {
    "breed": "Abyssinian",
    "country": "Ethiopia",
    "origin": "Natural\/Standard",
    "coat": "Short",
    "pattern": "Ticked"
  },
  {
    "breed": "Aegean",
    "country": "Greece",
    "origin": "Natural\/Standard",
    "coat": "Semi-long",
    "pattern": "Bi- or tri-colored"
  },
  {
    "breed": "American Curl",
    "country": "United States",
    "origin": "Mutation",
    "coat": "Short\/Long",
    "pattern": "All"
  },
  {
    "breed": "American Bobtail",
    "country": "United States",
    "origin": "Mutation",
    "coat": "Short\/Long",
    "pattern": "All"
  },
  {
    "breed": "American Shorthair",
    "country": "United States",
    "origin": "Natural",
    "coat": "Short",
    "pattern": "All but colorpoint"
  },
  {
    "breed": "American Wirehair",
    "country": "United States",
    "origin": "Mutation",
    "coat": "Rex",
    "pattern": "All but colorpoint"
  },
  {
    "breed": "Arabian Mau",
    "country": "Arabian Peninsula",
    "origin": "Natural",
    "coat": "Short",
    "pattern": ""
  },
  {
    "breed": "Australian Mist",
    "country": "Australia",
    "origin": "Crossbreed",
    "coat": "Short",
    "pattern": "Spotted and Classic tabby"
  },
  {
    "breed": "Asian",
    "country": "developed in the United Kingdom (founding stock from Asia)",
    "origin": "",
    "coat": "Short",
    "pattern": "Evenly solid"
  },
  {
    "breed": "Asian Semi-longhair",
    "country": "United Kingdom",
    "origin": "Crossbreed",
    "coat": "Semi-long",
    "pattern": "Solid"
  }
]
As you might observe, this file depicts a list with 10 cats. Each cat has information about its “breed”, “country”, “origin”, “coat”, and fur “pattern”.
The objective of this and of the following questions is to write shellscripts that read this type of file. To answer question 2, start by opening your local terminal and creating a file named “catfacts.json”:
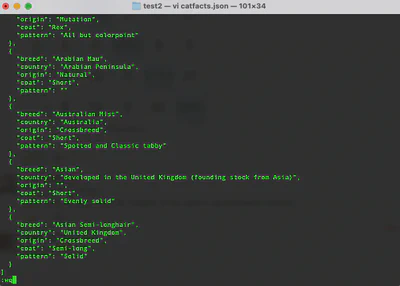
user@host: vi catfacts.json
Here is my screen with “vi” open and the creation of “catfacts.json”.
2.2. Create a shellscript to extract data from “catfacts.json” in your local terminal.
In the next step, let’s create a shellscript to extract information from “catfacts.json”.
user@host: vi catfacts.sh
Let’s say we want to extract all the breeds stored in the file (type inside the “catfacts.sh” file):
# shellscript to gather all the breeds stored inside catfacts.json
grep '"breed":' catfacts.json | uniq | sort
After saving the shellscript file and quiting the file editor, make it executable with “chmod” (on the terminal):
user@host: chmod +x catfacts.sh
Execute the shellscript (on the terminal):
user@host: ./catfacts.sh
The expected output is all the breeds stored within “catfacts.json”, without repetitions (uniq) and alphabetically sorted (sort):
    "breed": "Abyssinian",
    "breed": "Aegean",
    "breed": "American Bobtail",
    "breed": "American Curl",
    "breed": "American Shorthair",
    "breed": "American Wirehair",
    "breed": "Arabian Mau",
    "breed": "Asian Semi-longhair",
    "breed": "Asian",
    "breed": "Australian Mist",
Provide a screenshot with the output above on your terminal as your answer to question 2.
Question 3
The steps below will give you some structure to answer this question.
3.1. Install JQ in your local system.
To answer questions 3-6, install JQ in your system. For Linux users (your COMP 141 Virtual Machine is Linux):
user@host: sudo apt install jq
For macOS users:
user@host% brew install jq
JQ (JSON Query) is a library of shellscript commands that makes it easy to extract information from files in JSON format.
Test JQ on your machine:
user@host% jq --version
3.2. Create a JSON file with folks’ information.
Create “folks.json” using your local terminal:
user@host% vi folks.json
Here is the content you must add to “folks.json” (type inside the file):
[
   { "first": "John", "last": "Doe", "age": 25 },
   { "first": "Mary", "last": "Doe", "age": 24 },
   { "first": "Jack", "last": "Jones", "age": 22 }
]
This JSON file stores data about three people, namely John, Mary, and Jack.
Make sure “folks.json” has the expected content:
user@host% cat folks.json
3.3. Answer question 3.
How would you extract a specific element from an array?
We’ve done this in question 2. You can use grep or other commands written to a shellscript (".sh" file).
To introduce JQ to you, here is an example of how you can extract the last names from “folks.json”:
user@host% jq '.[].last' folks.json
Here is the expected output:
"Doe"
"Doe"
"Jones"
Here is an example of how you can extract everybody whose last name is “Doe”:
user@host% jq '.[] | select(.last == "Doe")' folks.json
The expected output is:
{
  "first": "John",
  "last": "Doe",
  "age": 25
}
{
  "first": "Mary",
  "last": "Doe",
  "age": 24
}
And here is an example of how you can extract the age of the second person (the one at position “.[1]”):
user@host% jq '.[1].age' folks.json
4. Get folks with age equal to 25?
Here is the JQ command for that:
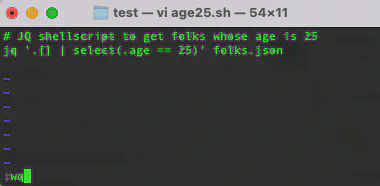
user@host% jq '.[] | select(.age == 25)' folks.json
To make it a script, add the command above to a new file named “age25.sh”.
user@host% vi age25.sh
Here is my screenshot saving this file with “vi”:
Don’t forget to make the shellscript file executable before using it:
user@host% chmod +x age25.sh
user@host% ./age25.sh
The next two questions are very similar, so I’m providing only the JQ command.
5. Remove key/value pair?
The command below removes the first name from the first person (position “.[0]”):
user@host% jq 'del(.[0].first)' folks.json
You can do the same thing for the last person, using “del(.[2].first)”.
6. Get sum of ages?
The command below sums up all the ages in the JSON file:
user@host% jq '.[0].age+.[1].age+.[2].age' folks.json
Observe that “.[0]” refers to the 1st person, while “.[1]” refers to the 2nd, and “.[2]” refers to the 3rd and last.
Following Questions
Questions 7-11 are more straightforward, but may you have any issues, let me know.
Daniel Moreira
Assistant Professor of Computer Science
Computer scientist with interests in (but not limited to) Computer Vision, Machine Learning, Media Forensics, and Biometrics.